
Essie
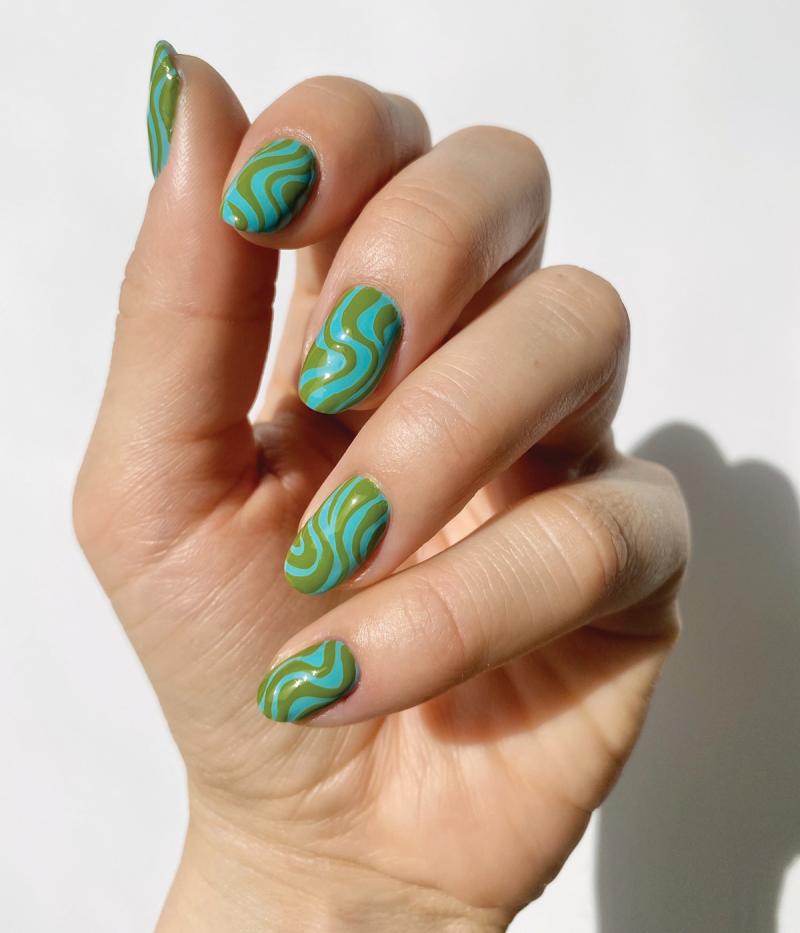
Step 1: After applying Essie Base Coat,apply two coats of Essie In the Cabana.
Step 2: With a striping brush dipped in Essie Willow in the Wind, apply wiggle lines and curves across the nail.
Step 3: With the same brush and color, thicken the lines.
Step 4: Finish with a high-gloss topcoat like Essie Gel Setter.
OPI

Step 1: Apply one coat of OPI GelColor Stay Strong or Stay Classic GelColor Base Coat and cure for 30 seconds.
Step 2: Apply two coats of OPI GelColor in Bee Unapologetic leaving the tip bare. Cure each coat for 30 seconds.
Step 3: Use a detail brush to create lines radiating across the tip. Begin in the center with OPI GelColor in Exercise Your Brights, working toward the right side with the following OPI GelColors—Sky True to Yourself, Feel Bluetiful, and Don’t Wait. Create. Fill in the left side with OPI GelColor’s Sugar Crush It, Mango for It, and The Future is You. Flash cure for five seconds.
Step 4: Use a detail brush and the same colors used in Step 3 to create triangle shapes on the right side of each line. Cure for 30 seconds.
Step 5: Apply one coat of OPI GelColor Stay Shiny Top Coat and cure for 30 seconds. Cleanse with N.A.S. 99 Nail Cleansing Solution and an OPI Expert Touch Nail Wipe. Apply OPI Pro Spa Nail & Cuticle Oil to each nail and massage it in.
CND
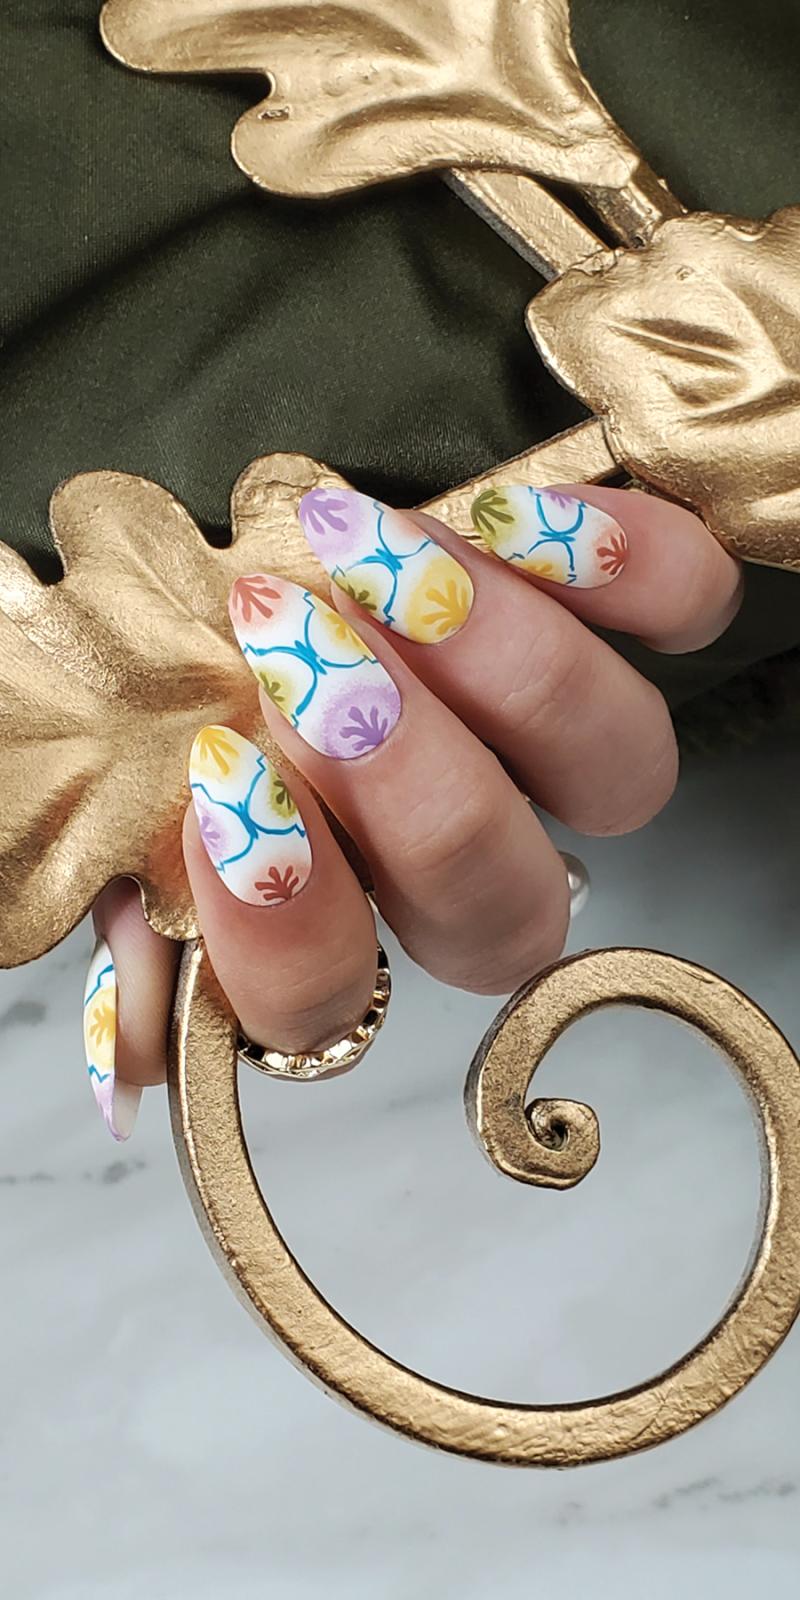
Step 1: Paint the nail with one or two coats of CND Vinylux in Cream Puff using the CND 5-Point Polish Method.
Step 2: Paint ceramic outlines using a detail brush with CND Vinylux Boats & Bikinis.
Step 3: Apply CND Vinylux Artisan Bazaar to the corner of a cosmetic sponge and apply to the cuticle area, creating a halo effect in a circular motion.
Step 4: Continue adding in the other three CND Vinylux shades—Limoncello, Olive Grove, and Terracotta Dreams—using new corners of the cosmetic sponge and alternating the colors from one nail to the next.
Step 5: Use a file detail brush in each of the four matching shades to apply scroll details on top of each of the sponged areas.
Step 6: Use the CND Scrub fresh and a gel brush to delicately remove any excess polish that may have been applied to the skin.
Step 7: Finish off with CND Vinylux Matte Top Coat.
Orly
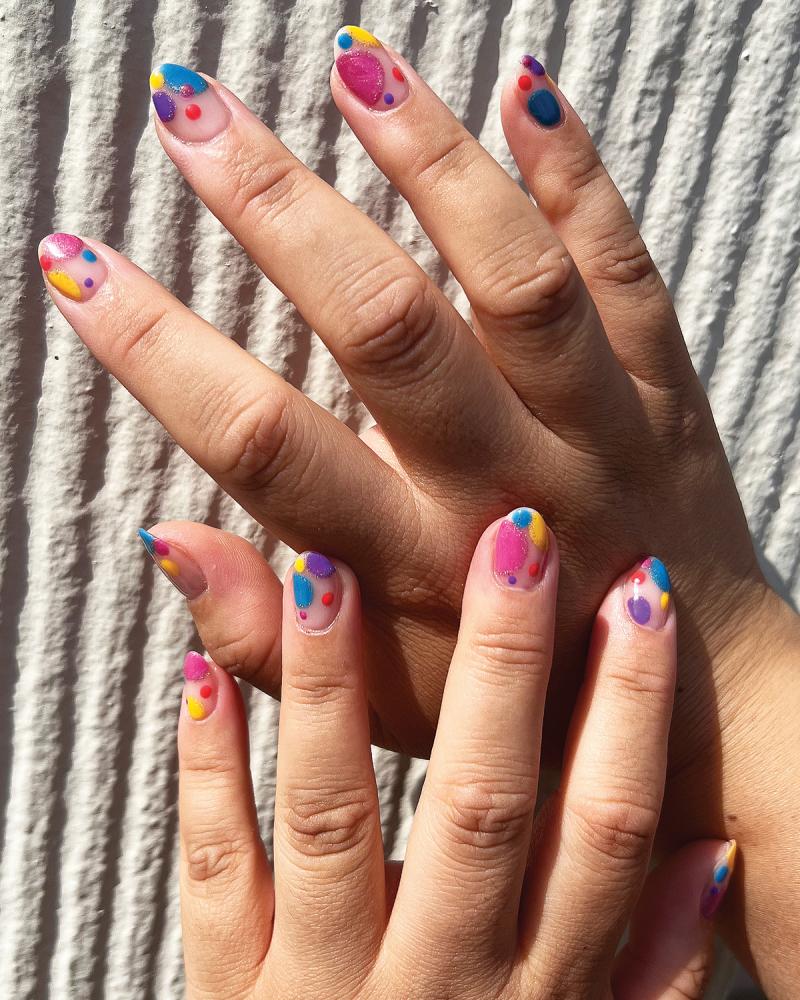
Step 1: On bare nails, create partial circles with the nail brush, alternating between different colors and different nails.
Step 2: Play around with the positioning—anchor some circles to the top edge, to the sides of the nails, and near the bottom cuticles.
Step 3: Using a dotter tool, apply smaller circles, using a circular motion to spread out dots into bigger circles. Be sure the dots aren’t all identical in size to make it more fun.
Step 4: Use Orly Just An Illusion to outline the bigger circles for added texture.
Step 5: Clean up any edges using a dry brush dipped in nail polish remover, and seal with a top coat like Orly Shining Armor Top Coat.